Difference between revisions of "200V example build"
From Electrical Age
(Format images, improve some sentences, etc.) |
|||
| Line 1: | Line 1: | ||
| − | + | If you got here by accident, check out '''[[50V example build]]''' first. | |
| − | + | This build is very similar to the 50V example build. | |
| + | == Differences from 50V == | ||
[[Image:Example_200V_1.png|800px]] | [[Image:Example_200V_1.png|800px]] | ||
| − | * | + | * 200V [[Medium Voltage Cable]] is used instead of 50V low voltage cable |
* The [[50V Heat Turbine]] is replaced by the [[200V Heat Turbine]] (blue) | * The [[50V Heat Turbine]] is replaced by the [[200V Heat Turbine]] (blue) | ||
| − | * | + | * The 50V machines are replaced by 200V machines. (blue) |
== Voltage control == | == Voltage control == | ||
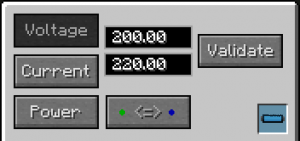
| + | [[File:Electrical-Probe-200V-Example.png|300px|thumb|right|[[Electrical Probe]] example for 200V build]] | ||
| − | * | + | * We need to set the voltage range to something near to 200V instead of 50V |
| − | * Note that it is ''relatively'' safe to over-volt the line a little. Just | + | * Note that it is ''relatively'' safe to over-volt the line a little. Just be careful to not over-amp it. |
| − | [[Image:Example_200V_2.png| | + | [[Image:Example_200V_2.png|600px]] |
| − | |||
| − | * (If you're using an [[Analogic Regulator]], 350 degrees | + | * (If you're using an [[Analogic Regulator]], 350 degrees Celsius is roughly the same) |
== Finally == | == Finally == | ||
| Line 27: | Line 28: | ||
[[Machine Booster]]s can get 200V machines running much faster than their 50V versions. Note that if you have machines boosted to max power, you might have to take turns with the machines so that you don't overload the line. | [[Machine Booster]]s can get 200V machines running much faster than their 50V versions. Note that if you have machines boosted to max power, you might have to take turns with the machines so that you don't overload the line. | ||
| − | == Where next == | + | == Where to go next == |
| − | You now have a good jumping off point for the other '''[[Examples]]''' | + | You now have a good jumping off point for the other advanced '''[[Examples]]''' |
You could consider building the '''[[Autominer example]]'''. | You could consider building the '''[[Autominer example]]'''. | ||
[[Category:Example]] | [[Category:Example]] | ||
Latest revision as of 22:30, 28 December 2016
If you got here by accident, check out 50V example build first.
This build is very similar to the 50V example build.
Differences from 50V
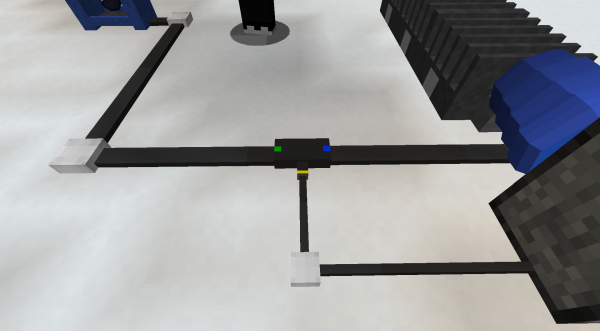
- 200V Medium Voltage Cable is used instead of 50V low voltage cable
- The 50V Heat Turbine is replaced by the 200V Heat Turbine (blue)
- The 50V machines are replaced by 200V machines. (blue)
Voltage control

Electrical Probe example for 200V build
- We need to set the voltage range to something near to 200V instead of 50V
- Note that it is relatively safe to over-volt the line a little. Just be careful to not over-amp it.
- (If you're using an Analogic Regulator, 350 degrees Celsius is roughly the same)
Finally
Spot the differences with the 50V version!
Machine Boosters can get 200V machines running much faster than their 50V versions. Note that if you have machines boosted to max power, you might have to take turns with the machines so that you don't overload the line.
Where to go next
You now have a good jumping off point for the other advanced Examples
You could consider building the Autominer example.


